|
Canva is a fantastic way to enable students to show their learning in a very creative way. Canva is an online design and publishing tools with templates, posters, infographics and other visual content. The new Canva for Education version is available for NSW public schools and includes tools and assets for presentation creation, collaboration spaces for sharing and evaluating student work. The NSW DoE login gives you the comprehensive Pro membership for you and your students. For more detail on Canva for education click here for the T4L website 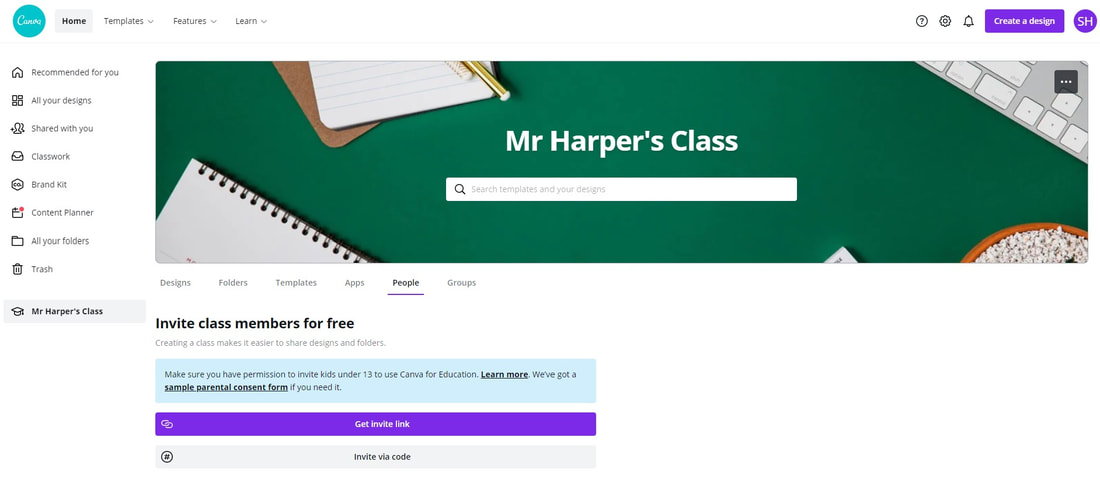 Watch this video to see how incredible this platform is for teachers and students. Canva has a full suite of courses for teachers and students to learn how to use the range of templates. 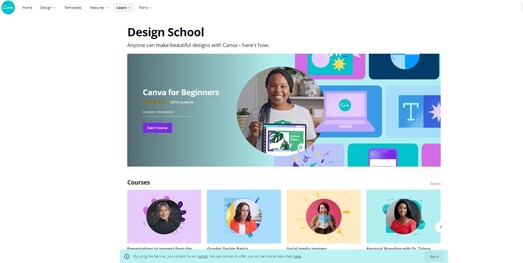 The following downloadable guides for teachers and students. Teachers quick start guide Student quick start guide
0 Comments
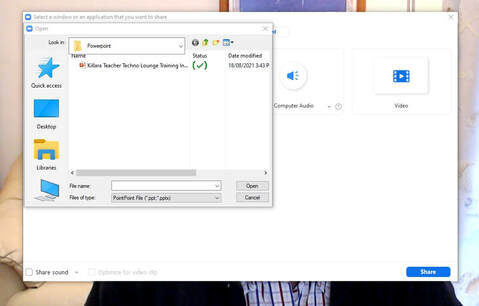
Are you aware Zoom has a number of advanced sharing features that will add interactivity and super charge your lessons? You can to use a PowerPoint as a virtual background or use a second camera in the one call to enhance learning.  So lets look at how to use these wonderful features and how they work in your online classroom. PowerPoint as virtual background
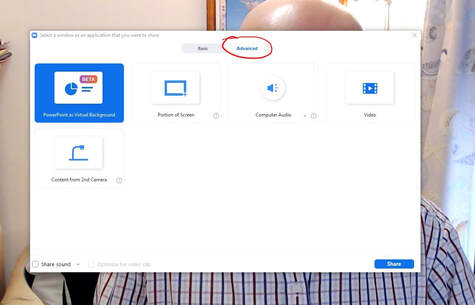

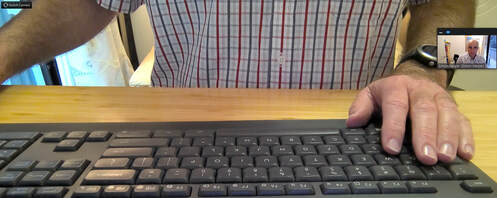
This feature could be used to do a science experiment or show something on your desk. Important: This will only work if you have two cameras e.g. web cam and laptop camera.
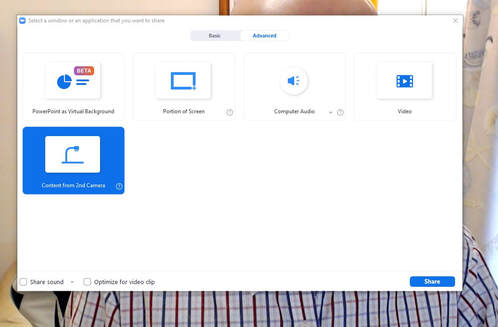
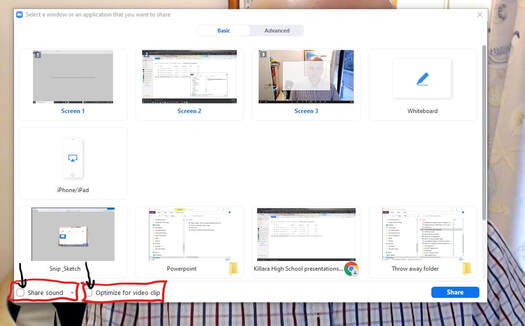
 Share audio for videos To share the sound of a video with your students there is a quick setting you will need to make.
 Please share and comment how you are using the advanced sharing features of Zoom.
Using your staff laptop connected to a second screen is a great way to juggle multiple programs, marking and managing your class when video conferencing. How to setup a second screen The following video has instructions to set up your screen and extend displays on your staff laptop so you can start to do some serious multi tasking. How to use split screen in Windows 10 The following shows you how to have multiple windows snapped together on one screen (up to four depending on the size of your screen). This is particularly helpful for marking and editing two documents at the same time. Teaching and Learning ideas with two screens
Once your screens are setup here are some ways you can use them to maximise your productivity. Marking assignments
During Learning from Home writing comments across your virtual platforms is very time consuming. Mote is the game changer you have been waiting for to save time and make the online experience more interactive for students. This Google Chrome extension gives you the ability to add voice comments very quickly any where in Google Workspace (formerly known as G Suite). Mote is a simple extension that can be installed into your Google Chrome browser. You are then able to open Google apps like Classroom or Docs and add voice comments. Placing voice comments with your staff laptop is easy and you don't need any extra equipment. Watch the following video to see all of the features. How to setup MoteIf you prefer a video click here to access the setup video Step 1: Go to the Mote extension website (click here to access) Step 2: Click add to Chrome button 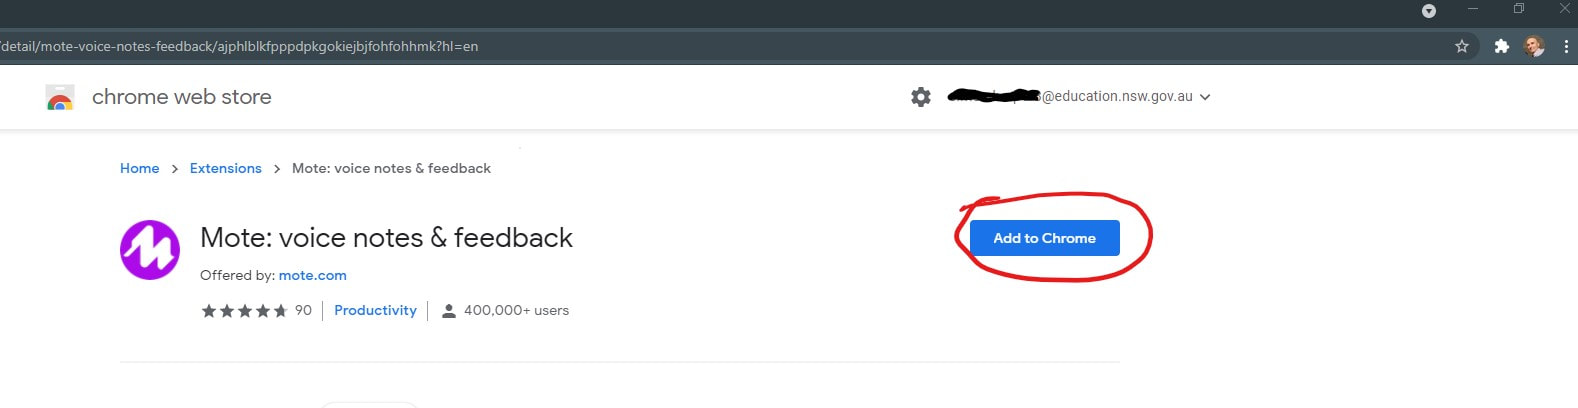 Step 3: Once you click agree and add the extension 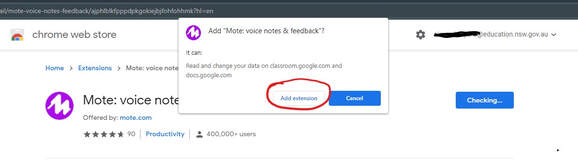 Step 4: Click that you are over 18, acknowledge terms of service and sign into with your department @education.nsw.gov.au email. 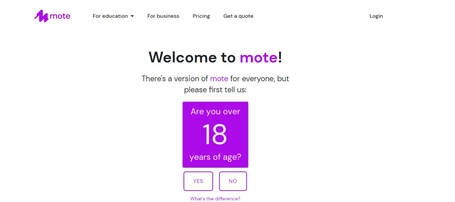 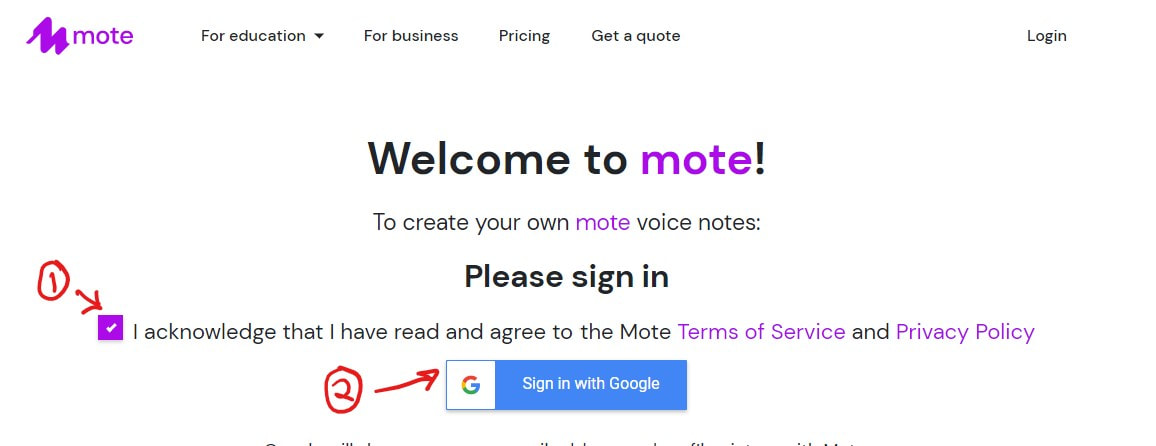 Step 5: Click on the extension button in your Google Chrome browser and pin mote on your ribbon. 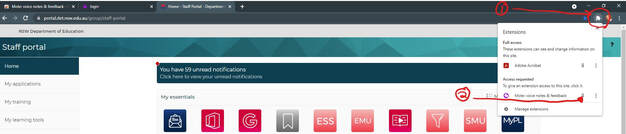 Step 6: Go to one of your Google Workspace e.g. Google Classroom. You will notice that there is a Mote icon messages in stream and in assignments. 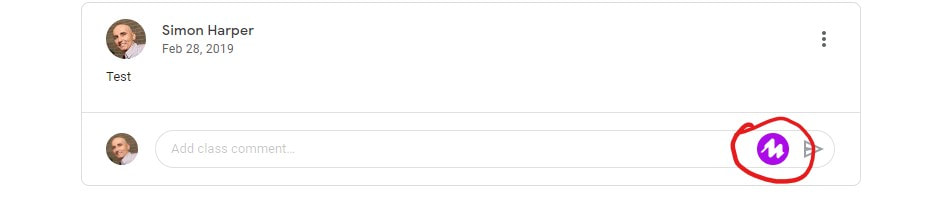 Step 7: Click record. To setup the first time you must click allow the use of the microphone. 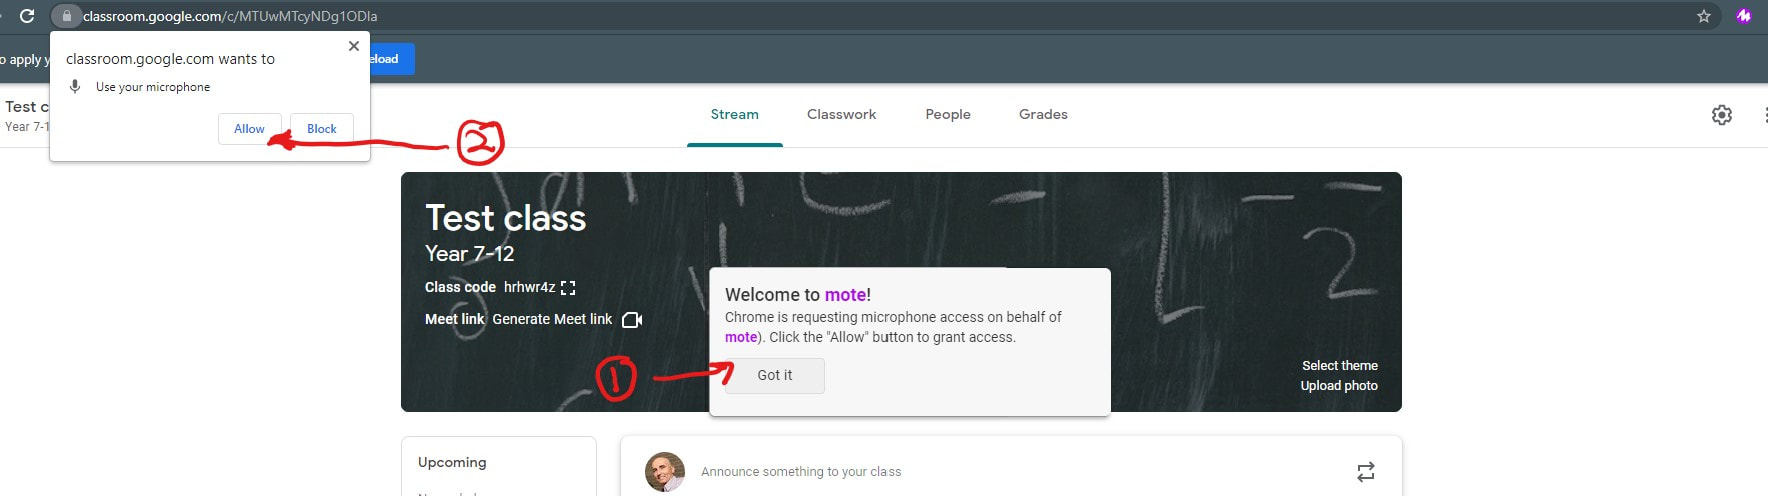 How to use Mote for voice commentsThe following videos will help you start with Mote voice comments. Place comments in Google ClassroomTo add a voice comment click the mote icon and talk to your computer, click the tick to finish, then send to students (if students don't have the Mote extension they will be sent to another web page with your recording and be prompted to add the extension). 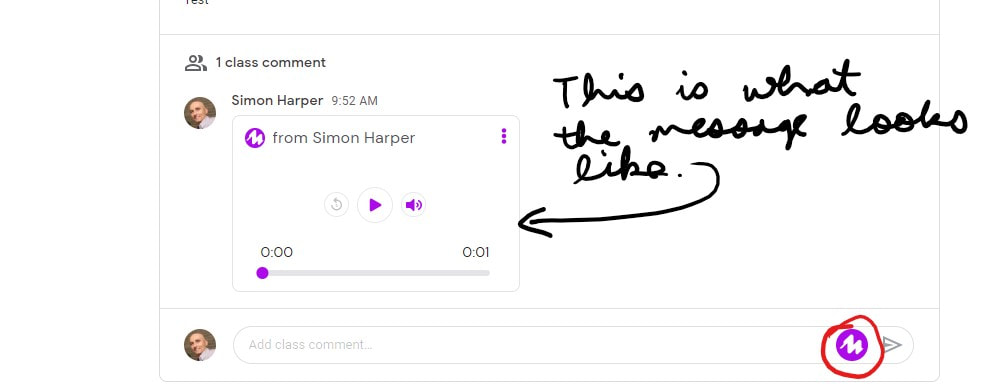 Class notes & feedback in Google ClassroomVoice feedback in Google Classroom assignmentsVoice notes on a Google docAdd Voice tags in Google FormsHave a play and be creative with this powerful tool. If there is enough interest we can run some training on Mote. Cheers Simon
|
WelcomeThe Killara Learning blog is here to share the tips, tricks and ways to leverage technology for better teaching and learning. Please comment on the posts. Blog Revolver map Archives
November 2021
Categories
All
|
 RSS Feed